Color Combination Sheets
I've assembled the guide below to help walk you through the instructions for this assignment. All of the steps are very specific, and I've created this walk-through in order to teach you certain tools and functions in Photoshop that are necessary for a full understanding of the program.
I want you to really work through these color combinations, and create relationships that are both accurate to the instructions and pleasing to the eye. One of these color combinations will be the ONLY colors used in the next project, so you need to make sure that you are happy with them.
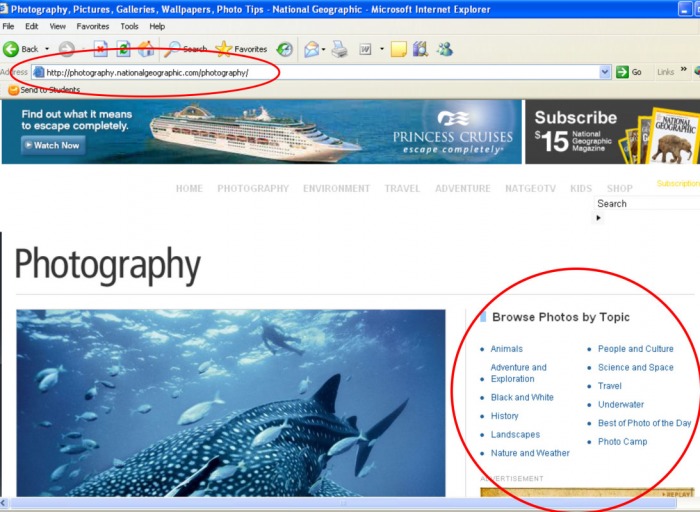
CLICK here to visit the National Geographic photography page. The site restrictions have changed since last year (when I made these slides...) so you can disregard the first slide. Basically, you will be selecting 4 photos from the animal galleries on the National Geographic website. Make sure that you have thought through what colors exist in the photos before you choose, but don't waste a bunch of time choosing the photos.
I want you to really work through these color combinations, and create relationships that are both accurate to the instructions and pleasing to the eye. One of these color combinations will be the ONLY colors used in the next project, so you need to make sure that you are happy with them.
CLICK here to visit the National Geographic photography page. The site restrictions have changed since last year (when I made these slides...) so you can disregard the first slide. Basically, you will be selecting 4 photos from the animal galleries on the National Geographic website. Make sure that you have thought through what colors exist in the photos before you choose, but don't waste a bunch of time choosing the photos.


Instructions for saving and sending
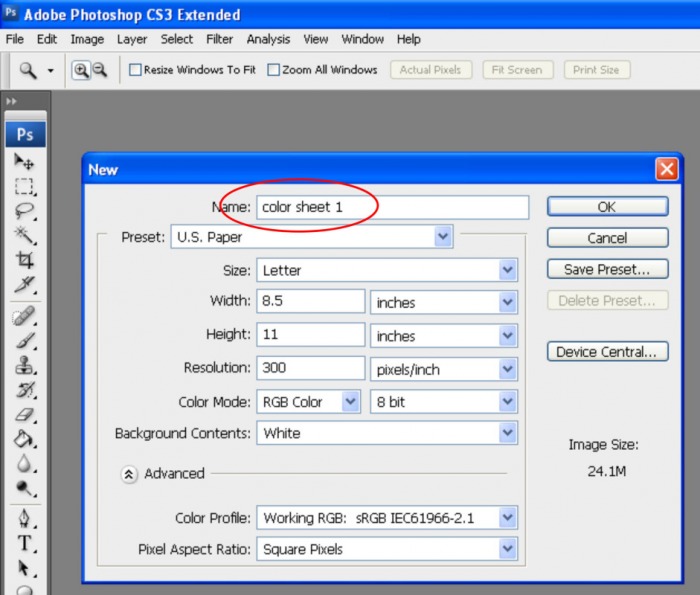
Once you have finished with your 4 color sheets, you should have “[your last name] color sheet 1, [your last name] color sheet2, etc., open up all of them in Photoshop. This next step is very important. Making sure that you have your originals saved as Photoshop files, we are going to condense a copy to send via email:
Go to LAYER in the menu bar at the top, and select, FLATTEN IMAGE. As you notice, all of your layers are condensed in your layers palette into one layer titled, BACKGROUND.
By doing this, it reduces the file size greatly, and allows us to save the image as a “.jpg,” file.
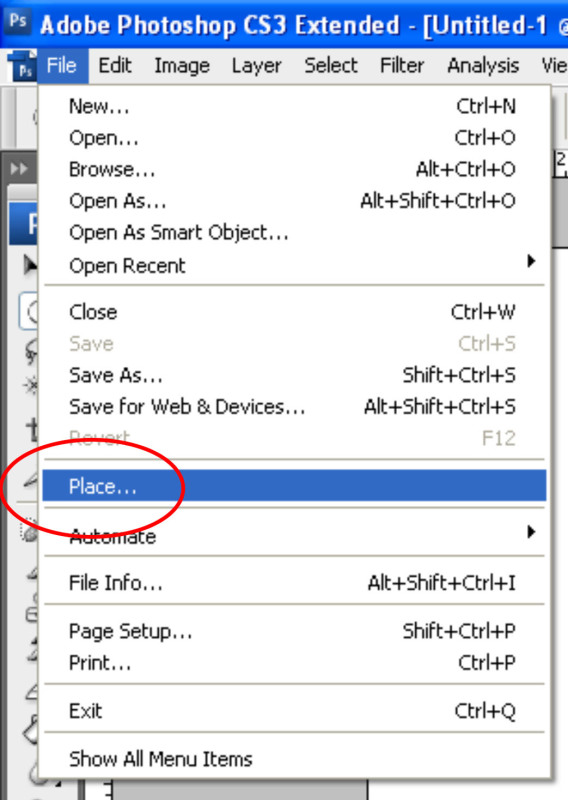
Go the FILE> SAVE AS> and keeping the file name the same, change the file type to .JPG.
IMPORTANT- IF YOU CHANGE THE FILE TYPE TO A .JPG, AND IT DOESN’T ATTACH THE SUFFIX .JPG, THEN YOU MUST ALSO TYPE IT IN SO THAT YOUR FILE NAME LOOKS LIKE THIS: “[YOUR LAST NAME] COLOR SHEET 1.JPG.”
You are ready to send… attach all four into one email, and follow our normal procedures for sending.
Go to LAYER in the menu bar at the top, and select, FLATTEN IMAGE. As you notice, all of your layers are condensed in your layers palette into one layer titled, BACKGROUND.
By doing this, it reduces the file size greatly, and allows us to save the image as a “.jpg,” file.
Go the FILE> SAVE AS> and keeping the file name the same, change the file type to .JPG.
IMPORTANT- IF YOU CHANGE THE FILE TYPE TO A .JPG, AND IT DOESN’T ATTACH THE SUFFIX .JPG, THEN YOU MUST ALSO TYPE IT IN SO THAT YOUR FILE NAME LOOKS LIKE THIS: “[YOUR LAST NAME] COLOR SHEET 1.JPG.”
You are ready to send… attach all four into one email, and follow our normal procedures for sending.
